Identifying the Roof Membrane Before an RV Rubber Roof Replacement

rv rubber roof replacement

A solid and reliable RV roof is important if you want to continue enjoying your mobile home without the hassles brought by an inadequate roofing. A basic knowledge of the different types of RV roofs is crucial if you want to care for your roof.

There are basically three types of materials that your RV roof could be made of—metal, fiberglass or rubber. Identifying a metal roof is fairly easy. While they are not common these days, metal roofs such as galvanized metal and aluminum were widely used decades ago. Fiberglass roofs are also becoming rarer nowadays.

Around 20 years ago the RV industry found a new type of roofing material that works better than metals or fiberglass and has qualities not found in the old roofs. The product is a rubber roofing membrane that is lightweight, cost-effective, easy to install and maintain, seamless and resistant to UV light.

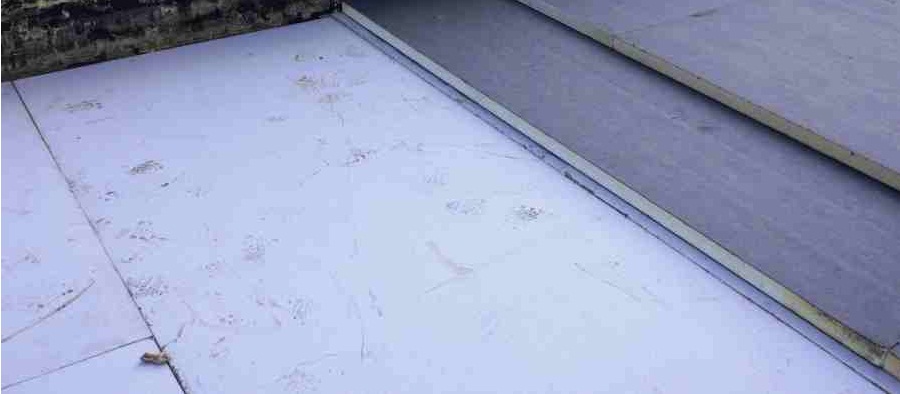
EPDM and TPO Rubber Roofs

The two popular types of RV rubber roofing are EPDM (Ethylene Propylene Diene Monomer) and TPO (Thermal Poly Olefin). If your RV has a rubber roof, it could either be EPDM or TPO. When the time comes when you need to have an RV rubber roof replacement, you should be able to identify the type of rubber your RV has in order to install the right material.

How do you know which type of rubber roof is installed on your RV?

Check Owner’s Manual

The first thing you should consult is the RV owner’s manual. It should plainly state what type of rubber membrane was used on the RV. It will also lists the maintenance and cleaning instructions for your RV. If you have no access to the owner’s manual or for some reasons it does not specify the type of rubbing membrane used, there are ways to determine the type of your RV rubber roofing.

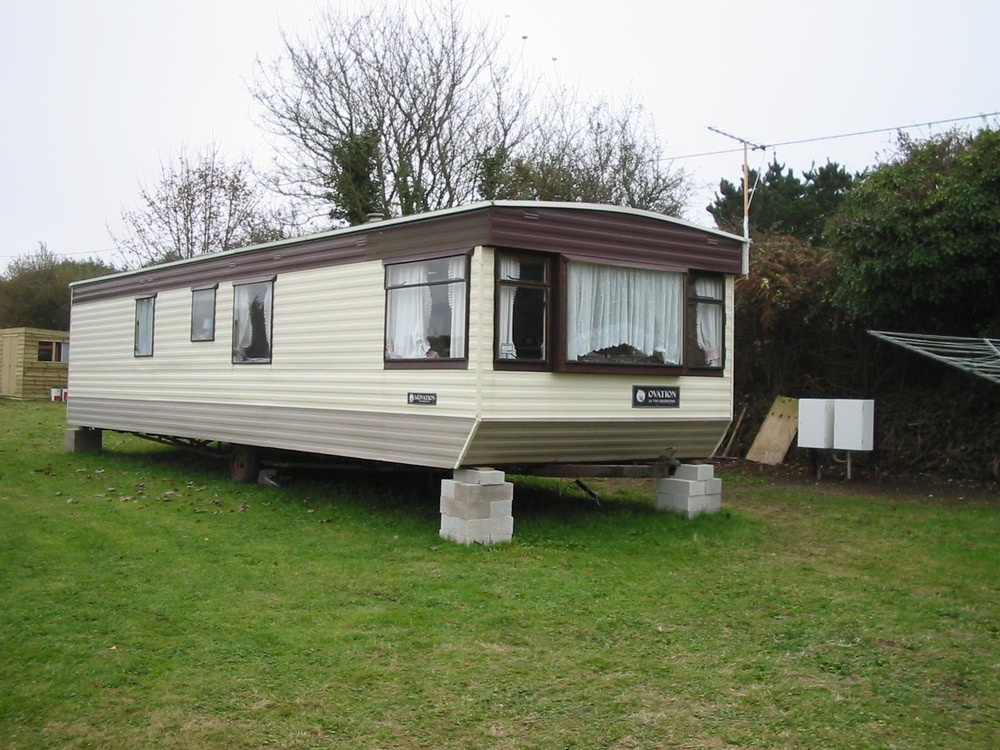
Gray or White Streaks

Look for gray or white streaks on the sides of the RV. EPDM membrane is designed to oxidize over time to protect it against UV rays and ozone. The oxidization or shedding produces the gray or white streaks found on the body of the RV.

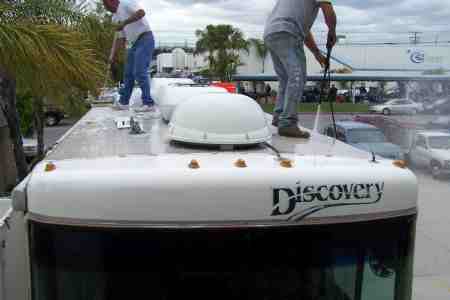
Unlike EPDM, TPO rubber roof does not oxidize so you will not see any white or gray streaks on the sides of the RV. Another characteristic of a TPO membrane not found in EPDM is its glossy look.

Slippery When Wet

Another difference between the two types of rubber roofing is that EPDM is very slippery when wet while TPO is not.

Handler 140 Welder Tool For Mobile Home Roofing

handler 140 for mobile home roofing

Commonly referred to as the Handler 140, the product is Hobart’s most popular wire feed welder. It packs extra welding power but is built with portability in mind to make it easy for the user to transport it anywhere demanded by work.

Sets Up Easily from the Box

The welder is very user friendly in mobile home roofing. It takes only a few minutes to set it up and get it ready for use. On the inside cover, you will find a setup guide with easy-to-follow instructions so you can set up the welder properly. Even first-time welder will find it easy to prepare and use. It is also MIG ready as there is no need to buy additional kit.

Delivers Industrial Performance

Once the welder is properly set up, you will find the Handler 140 a versatile welder capable of industrial performance. It operates on 115 volt household current so you can just plug it in your home sockets and start working. To give the user complete control and create a smooth stable arc on all thickness, the tool is designed with a 5-position voltage control selector.

The Handler 140 with its industrial cast-aluminum drive system and a heavy-duty clamp system is a versatile product that is suitable for use on a variety of works, including household repairs, auto body and parts. It packs extra power allowing the welder to handle even power-demanding farm projects.

Limitless Uses and Applications

With its versatility and power, the Handler 140 is virtually limitless in its application and uses. DIY enthusiasts will find the tool perfect for do-it-yourself projects such as repairing and fixing lawn and garden equipment, tool carts, metal sculpture, trailer frames and hitches, mower decks, exhaust systems, auto body panels, fences and gun/bow racks.

Stands Out from Other Products

The differences between the Handler 140 and similar products in its category are apparent right from the time you take it out of the box. First thing you will notice is its solid construction. The body is made of stronger and thicker steel compared to thinner shells of similar tools. The wire feed assembly is composed of metal parts, unlike other welders where mostly plastic components are used. Practically every component of the Handler 140 is sturdier than other products in the market.

The package contains everything you need to start welding right away. The box comes with the Handler 140, 10-foot MIG gun with liner, 10-foot cable and clamp, 0.30 flux-cored wire sample pool, 8-inch pool adapter, dual-gauge regulator and gas hose, setup guide and owner’s manual.

We say the product is a great buy at its price and delivers high performance for welders in its category.

How to Prevent Stray Cats from Climbing the RV Roofing

cats on rv roofing

Stray cats climbing on top of the RV roofing present multiple issues to the owners. They litter the roof with food remnants and emit sounds deep in the night that could keep them awake. Cats also scratch the protective coating on the roof, which ultimately degrade its condition.

There are several steps that you can take to prevent stray cats from climbing on top of your roof.

1. Use Citrus

Cats do not like the smell of citrus. You can use air spray with lemon or citrus scent and spray the whole length of your RV roof to keep stray cats away. If you have lemons or oranges, you can place them on different areas of the roof to make it smell like citrus.

2. Motion-Activated Sprinkler

Install a motion sensor at the top of the RV roof or the sides where stray cats usually pass to climb on top. Connect the device to a sprinkler system that is attached to a hose. Once the motion sensor detects activity on the roof, it will set off the sprinkler system, and water would come out drizzling the cats. After a few times of getting sprinkled with water, cats will remember the experience and avoid going up on your RV roof.

3. Offer An Alternative Place

Another way of keeping stray cats away from your RV roof is by luring them into another place nearby. Look for an unused area near your RV that is suitable for luring the cats into. You can use catnips to lure stray cats into the area. Crush the leaves of the catnip to release the aroma that is irresistible to cats and put them on the designated place. The stray cats would hopefully stay there for good instead of lounging on your roof.

4. Cat-Repellents

Products advertised as cat-repellents are available. Some people attest to the effectiveness of these products in keeping cats away. These are generally sold in spray form, which make them convenient and easy to use. Just spray evenly on the surface of the roof and you have an anti-cat smell floating around your RV roof.

5. Habitat Modification

You might want to find out the reason why stray cats love hanging around your roof. Perhaps something could be found there that attracts them. One way of keeping cats and critters from your roof is through habitat modification. These unwanted visitors could be persuaded to stay elsewhere by introducing changes to the immediate environment such as not leaving food lying around, storing trash in closed containers and removing food and water sources near your RV.

Things to Avoid During Mobile RV Repair

rv-roof-repair

A well-maintained recreational vehicle gives you several years of fruitful and enjoyable service. Regular inspection and maintenance works are the keys to prolonging the life of your RV. Unfortunately, the roof receives only a little attention from owners because they seldom go up to check its condition.

Long miles of travel under different weather conditions could exact a toll on the roof condition of your RV. Even if we constantly observe regular maintenance schedule, time comes when we have to make necessary mobile RV repair.

When you have to make a repair work on your RV roof, avoid committing what we listed below to make your mobile RV repair experience a pleasant and not an expensive one.

Things to Avoid

1. Use of Harsh Chemicals

Never use harsh chemicals on an EPDM rubber roof. They, along with petroleum-based and abrasive products, can damage your rubber roof. A mistake could mean replacing the entire roof.

2. Using Just About Any Roofing Material

Never use any product that is not specifically suited for RV roof use. Sellers of rubber roofs for homes may or may not carry products for RV roofs. Rubber roof membranes for RV are different from those used for homes. They are generally flexible to withstand vibrations and shaking.

3. Not Checking the Sealant Used

Most RV today use rubber roofing membrane, fiberglass and vinyl. Rubber roofs are either Ethylene Propylene Diene Monomer (EPDM) or Thermal Poly Olefin (TPO). If you are going to apply sealant on your rubber roof, use the right type of sealant for the rubber surface of your RV. Using the wrong sealant would not only cost you more money but require more work. For instance, a silicon sealant should not be applied to a rubber roof because it will peel off easily.

4. Non-Observance of the Proper Cleaning Procedure

Thoroughly clean the roof before doing any repair. Do not use cleaners that contain abrasive materials, citrus ingredients and petroleum solvent as these cleaners could cause permanent damage to vinyl and rubber surfaces. Cleaning rubber roofs is actually simple—you can use household cleaners and dishwashing liquid for normal cleaning.

5. Breaking the Manufacturer’s Warranty

Before doing any major work or repair on your roof, check with your RV manufacturer to prevent voiding the warranty in case you installed the wrong roofing material.

6. Putting Your Entire Weight on One Portion

Do not walk on your RV rubber roof without first laying plywood or other light wood materials over the seams. This way, your weight is not concentrated on the area that you step on but distributed equally across the roof rafters.

How to Easily Install a Mobile Home Roofing

mobile home roofing

Installing your own mobile home roofing will save you a lot of money. It does not take highly-specialized skills to accomplish it. You will just have to equip yourself with the right tools and materials to be used in the installation.

The hardest part in the whole process is the removal of the old roofing material, and cleaning the roof of debris and dirt. Getting help from friends and paid labor is advisable to facilitate the removal. After that you can just follow a procedure on the best way to install a new roof on your mobile home.

Here is a simplified procedure in installing your new mobile home roof:

Step 1

Lay out the insulation on the entire length of the cleaned and scraped roof. Use a knife to cut off excess portion of the insulation. Seams can be sealed using a duct tape.

Step 2

Put furring strips (1 by 4 inches) on the length of the roof, about 2 feet apart. Locate the rafters on the roof and mark their location using chalk lines across the roof width. Feel around the surface of the roof to find the exact location of the rafters. Affix the furring strips to the rafters using a drill and 3½ inch-long deck screws.

Step 3

Cut the corrugated metal sheets to the correct size using a circular saw. Add an extra 8 inches for overhang after measuring the width of the roof. Position the metal sheet along the edge of the roof, but make sure there is an overhang of 4 inches on both sides. Use a drill and 3½-inch deck screws to fasten the metal sheet to the furring strips. Remember to place the foam closure strips on both sides of the metal sheets.

Step 4

In placing the metal sheets on the roof, you must overlap them in one direction only to prevent leaks. Each metal sheet has a mark on one edge. Put the edge without the mark on the edge of the next sheet with a mark. Insert the foam closure strips into the ends of each metal sheet. Do this until the whole roof is covered by metal sheets.

Step 5

To facilitate laying out the metal sheets, remove all vents from the roof including furnace vent. Put markers on the metal sheets where the vent holes would be and cut them out. Be sure to replace damaged rubber boots on all the vents to prevent water leaks. A neoprene rubber roof sealant is effective in caulking cracks and holes around the vents.

Step 6

Attach the gable trim on the ends of the roof and secure it using a drill and 3½-inch deck screws. You now have a new roof on top of your mobile home.

Liquid RV Roof Coating Pros and Cons

liquid roof rv roof coating

Even the sturdiest RV roof will ultimately develop cracks and weaknesses due to prolonged exposure to extreme weather conditions.

To ensure that your RV’s roof remains in pristine condition, regular checkup and maintenance are necessary. In the event cracks develop on the roof, you can select from several RV rubber roof coating products available in the market. However, with so many roof repair products to choose from, people are expectedly confused on which ones deliver on their promise.

One of the well-known products in the market today is Liquid Roof RV roof coating. It is a liquid EPDM (Ethylene Propylene Diene Monomer), and therefore, possesses all the characteristics of EPDM when properly applied to the roof. When it cures, it offers the same advantages of an EPDM membrane, including flexibility and stability.

We reviewed the Liquid Roof RV roof coating and came up with its pros and cons. Here are what we found:

Strengths

  1. Versatile. It can be applied to virtually any surface such as fiberglass, fabric, sheet rubber, plywood and metal with the use of a brush, roller or squeegee. Most people prefer squeegee while others opt for a combination of brush and roller.
  2. Convenient. The product becomes water proof instantly after application, although there is a required curing time. The best part is that only one application is needed for total protection. It also self-levels once applied, thus minimizing on labor hours. You have plenty of time to properly apply the product before it cures.
  3. Economical. One gallon of RV roof coating covers 40 to 46 square foot. It lowers interior temperature by reflecting sunlight with its white color, which means huge energy savings.
  4. Total Protection. The product is resistant to ozone and Ultraviolet rays from the sun. It can withstand freezing snow, alkalis, acids and salt water. It also prevents ponding of water on the roof that could lead to leaks.
  5. Durable and Flexible. Liquid Roof remains flexible and durable at temperatures between -60°F to 300°F. The coat sinks into every crack and crevice in the roof, ensuring a water-tight application.

Weaknesses

If you buy a four-gallon container of the product, be sure to use it within a year from opening. Some people found the content separates into a rubbery top coat and white stuff underneath after some time. Others complain that applying the coat is slightly difficult because of its thickness.

Conclusion

The superior qualities and performance of Liquid Roof RV roof coating easily outweighs the very few apparent weaknesses of the product. In truth, these are not flaws that affect the quality of the product but merely the result of its improper use.

Top 3 Ways to Save Energy Costs in Mobile Home Roofing

For people staying in the cold regions of the country, it is important to have a mobile home roofing that could withstand the temperature drops as well as provide its occupants an effective and convenient way to keep themselves warm. This should work the other way around too for people in warm ares. But this should be done in an efficient method that would not use up too much energy.

Here are some ways to save on energy costs in mobile home roofing:

1. Make a Roof-Over

roof-over

A roof-over is an insulation method that uses wood frame-and-sheathing cap. The wood is situated over an existing roof, hence its name. Then it is covered with roofing felt and fiberglass shingles to offer protection to the wood against harsh environmental elements and to make it appear like an ordinary roof.

This is easy to fit. If successfully installed using the right materials, a roof-over can save households around 20 to 40 percent in utility bills.

2. Use Rigid Foam or Styrofoam Insulation

styrofoam

This one involves more work than the roof-over, and you should have a lot of space between your ceiling and your roof. It is more ideal if it is placed on the attic. It could prove to be more expensive too, especially the products that offer a higher R-value to the walls. But the pay off is that you will have better insulation compared to the one above.

3. Install PV Solar Panels

pv solar panel

Photovoltaic (PV) solar panels are quite expensive. The standard 3kW to 8kW systems can cost you around $15,000 to $40,000. However, the price alone should not discourage you from taking that alternative.

Savings should not only be viewed on a short-term perspective. In the long run, you will be able to save up a lot in terms of electricity since it generates natural power to your home. Add to that the federal incentives for using such energy source and you will be able to get the money you spent for your solar panels in less than a decade. After the stated period, it will be absolute savings on your part in the use of electricity for heating or in temperature control.

With the proper maintenance, these can also last for a lifetime.

Reminder

The efficiency of your mobile home roofing in delivering insulation is dependent on the quality of the products used and the way its components are fitted. So make sure that you got the right product from reliable providers plus ensure that you have the right person for the job.

Why RV Rubber Roof Replacement Makes Sense

It is important to inspect the roof on your RV at least twice a year to look for signs of leakage or cracks in the roof. The roof is typically the first place that will develop a leak on an RV. Replacing the roof on recreational vehicles is a common problem mobile RV repair problems owners face as their RV ages. The roofs on motorhomes, 5th wheel trailers, and travel trailers will not last forever, so repairs are often a main concern. Once the roof begins to leak, it can cause all kinds of expensive repair problems to the interior of the RV. In fact, water damage is one of the things that can cause the most problems and will eventually destroy your RV. Recreational vehicles represent one of the most expensive investments you can make, aside from your house. As soon as you know the roof is leaking, the best solution may be getting a new RV rubber roof replacement.

There are different kinds of mobile home roofing materials on the market one can use that work well on RV roofs too. However, most RV owners today consider the rubber roof replacement the best solution, no matter what kind of original material their RV roof was made from. Aside from making the roof completely water proof, a RV rubber roof replacement will eliminate most of the loud noises one hears inside when rain or hail falls on the roof. A rubber roof replacement will also reduce wind-buffeting noises.

RV rubber roof coating also has other advantages. For instance, rubber will not dry out, crack or become brittle. Rubber roofing systems do not stretch and loose shape. It also is one of the best insulating materials to use for an RV roof. It will keep your RV cooler in the summer and warmer in the winter. Rubber is flexible too, so it will bend smoothly around the corners and curves of various models to provide a permanent, leak proof seal around the edges and corners. Once the rubber roof is installed that is all there is too it. You do not even need to paint the roof. Rubber does not excrete runoff that discolors and causes streaks down the sides of the RV either.

RV owners who want to make a quick and simple repair in a small area on the roof that is leaking can use Eternabond roofseal tape. This may prevent further leakage, at least until they can get a new rubber roof installed. Eternabond is great for minor repairs. Tar products and caulking repairs generally do not last as long and can lead to more costly damages and expensive repairs. There are liquid spray sealants on the market too. However, a major leak may require an entire roof replacement. There are kits on the market that the owner can buy. This type of job is not for your ordinary RV owner however. It can take many hours to complete the job of installing a new rubber roof on a recreational vehicle. Local RV repair shops staffed with experienced professional that can make the repairs needed or install a new RV rubber roof replacement. Anyone interested in replacing their existing roof with a rubber roof replacement, be sure to call a local RV repair shops for estimates today. Online roof replacement systems in the form of kits are available online today DIY projects as well.