Roofing Kansas City: How to Make Your Roof Tornado Proof

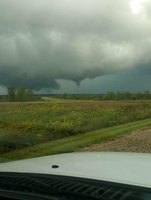
Tornadoes are the biggest threat to houses and pose the greatest danger to homeowners in the United States. They pack wind strengths with up to four times more destructive power than hurricanes and earthquakes. Normal housing construction methods are generally inadequate to resist the devastation brought by the strong winds of tornadoes, but it is not difficult to fortify your house against this destructive force of nature.

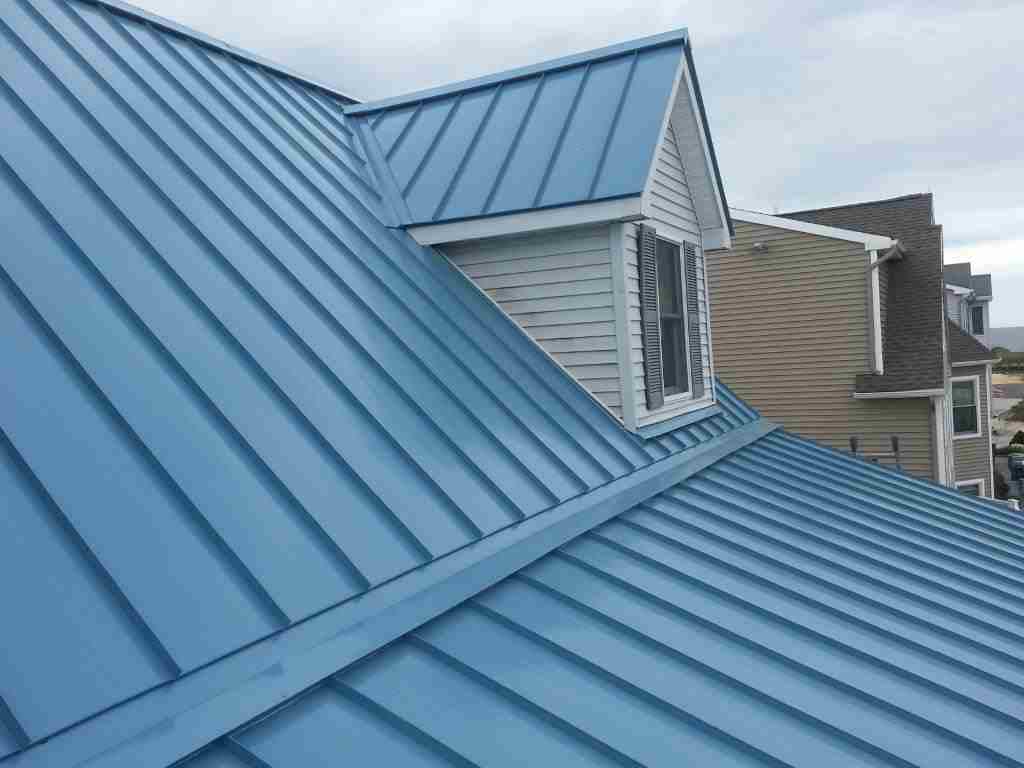
Every time a tornado hits, the first thing that goes off a house is the roof. A tornado exerts upward pressure against the roof and either inward or outward pressure against the walls. Once the roof lifts off it will leave the walls weak and unstable because the lateral stability provided by the roof is gone. That is why the importance of reinforcing your roof cannot be overemphasized.

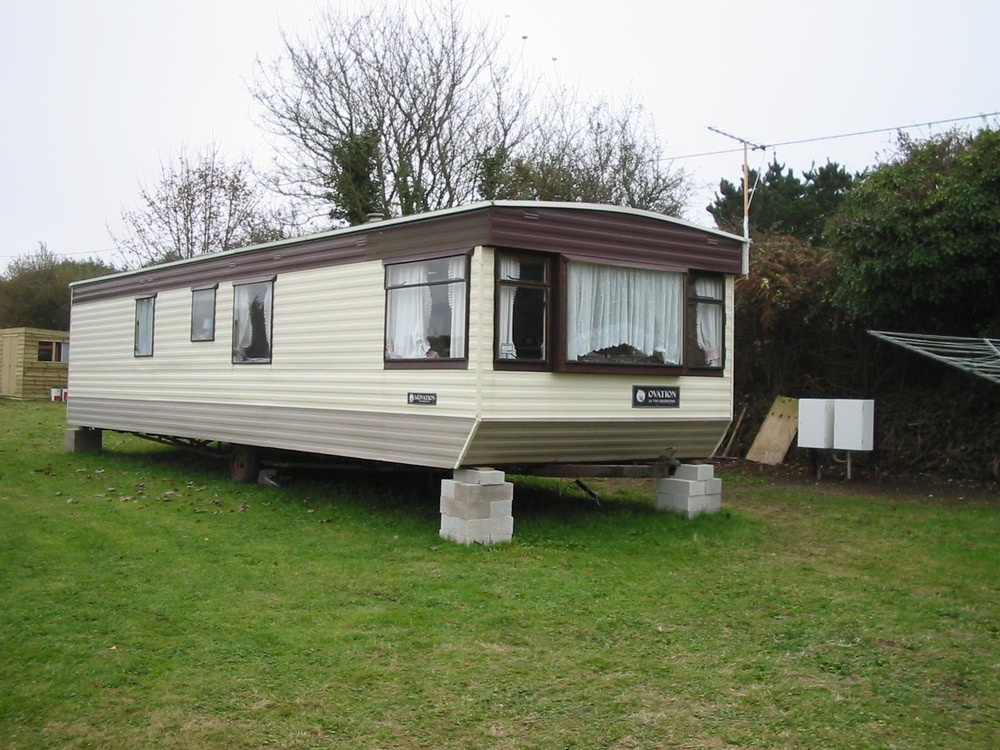
Of course, different roofing Kansas City materials have distinct durability and toughness. Wood-framed houses are admittedly weaker compared to concrete buildings.

Reinforced Concrete Roof Decks

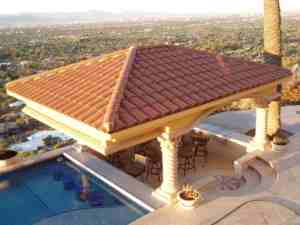
The roof systems that have been observed to consistently withstand tornadoes and hurricanes are those constructed with structural reinforced concrete decks, which are similarly connected to structural reinforced concrete walls.

Concrete walls are required to be reinforced to withstand the horizontal and vertical pressures of the wind as it beats on the roof. These walls are referred to as shear or bearing walls. For the entire structure or building to become fully resistant to the destructive winds, the roof structure must act as a solid and dependable structural diaphragm.

Reinforcing Non-Concrete Roof Decks

If you have a roof other than concrete decks, there are variety of ways to reinforce it and increase its resistance against the strong winds brought by tornadoes. One solution is to use hurricane clips on the roof. The clips attach the trusses or rafters to the top plate, thereby strengthening the link between the two parts. The reinforcement of the connection is amplified and could withstand far greater wind pull compared to the typical connection used on houses, which is a toenail hammered at an angle that lacks the protection provided by the hurricane clips.

Depending on the clips used, hurricane clips provide uplift protection from 400 to 1500 pounds or possibly more. In ordinary areas, a clip designed for uplift protection of 500 pounds may be installed on every other trusses. However, in hurricane-prone areas, using the strongest clip and attaching them to every truss is highly recommended.

Best Ladders for Roofing Installation

One of the difficult parts in house construction is roofing. Unlike the flooring and walls where you can perform the work while staying on the ground, roofing requires you to go up the house in order to install roofing materials.

Risk of falling is ever present when you go up elevated places, more so when you are working on the roof of a partially-finished house. That is why strict observance of safety precautions is the number one rule while doing roof installation to prevent accidents that could cause injuries.

A roofer’s best friend while working on the roof is a ladder. This common but important tool assists workers to go up the roof and do their work. Just make sure that you are using ladders that meet the safety standards for the type of work you are doing. Also, use the right type of ladder since some ladders work best for particular jobs but not on others.

Among the different kinds of ladders, these are the best for roofing installation:

Step Ladders

This is the most common type of ladder used in the construction industry. They are shaped like an “A” and are self-supporting. This means that you do not have to lean them against the wall to be able to climb on it. If you are working on the edges or near the edges of the roof, step ladder is the best one to use. You can cover more areas of the roof since your ladder is not resting on the walls.

Extension Ladders

Unlike a step ladder, extension ladder needs to be leaned against the wall or other support to use. It consists of a “base” that is placed firmly on the ground and an extension part, called the “fly,” which is used to reach high places. The “fly” is a movable piece that retracts to the base when not in use. Roofers normally use this type of ladder in going up the roof from the sides because it can reach higher areas compared to the step ladder.

Roof Ladders

The ideal type of ladder when working on pitched roofs. This is actually a variation of the extension ladder, typified by a hook at the end. It has two wheels at the upper end designed to prevent damage to tiles or slates when pushed up the roof. Opposite the wheels is a hook that is used to fit over the side of the roof ridge to prevent the ladder from slipping down the pitched roof.

Tips on Successful Mobile Home Roofing Installation

mobile-home-roofing-installation

If you want your roof to last long and provide maximum protection to your mobile home for years to come, proper installation is a must as well as regular maintenance. Do-it-yourself mobile home roofing is practical and saves you money from installation costs. However, make sure that you follow the correct procedure in roof installation.

While installing roofs on your mobile homes, remember these practical and useful guides to ensure your safety and the best result from your work.

1. Working on the Roof

Walk near the edge of the roof when walking on the roof because that is usually the strongest area of the roof. For additional safety precaution, use a plywood or boardwalk when walking on the center of the roof.

2. Proper Use of Ladder

Ladder should be extended by at least three feet above the roof for convenience and safety. It is easier to get on and off the roof with the extra ladder protruding on the side of the roof serving as handhold. Secure the ladder with rope or other fastener to prevent accidental slippage while you are climbing.

3. Scaffolding for Convenience

Use a scaffolding instead of a ladder when you are installing foam closure strips or insulating the roof cavity on the edges of the roof. It may not be safe or convenient to use a ladder when doing this part of the work.

4. Wear Protective Gears

Protect yourself from dust and other fine materials when cleaning insulation. Blowing insulation produces dust that is harmful to the lungs and irritating to the eyes. Wear protective gears such as gloves and respirator to protect your health.

5. Preventing Fires

Avoid installing combustible materials within 2 inches of flue pipes. Mobile home flue pipes should have at least double or triple walls. Install extra metal pipe sleeve and metal collar at the ceiling or use noncombustible materials such as fiberglass to further contain the warm surface of flues.

6. Cleaning the Roof

Clean the roof before applying any sealant as the compound will not adhere properly to a dirty roof. Brush away any dirt, leaves or twigs that have settled on the roof. Once it is clean, look for cracks and holes and apply the sealant. Avoid walking on the roof while applying the sealant to ensure maximum adhesion. Use a ladder for those hard-to-reach areas.

7. Apply Sealant Twice

Double coatings are always better than one. Apply the sealant twice on the roof but allow the first layer to completely dry off before adding the second coating. Using a roller is preferable since you do not want to step on the roof while applying the sealant.

Effective Seattle Roofing Maintenance Tips

metal roof

The roof is an important part of your house. It protects you and your family from the elements. Severe weather conditions, however, could considerably shorten the lifespan of your roof. To keep it in excellent condition, you must perform regular checkup and maintenance. Taking care of your roof will ensure its long and healthy lifespan. Neglect to properly care for your roof could mean expensive repairs on your part.

Seattle is characterized by wet winters and dry summers. It receives more rainfall in November than any other cities in the US. It is, in fact, one of the five rainiest cities in the country. Seattle roofing maintenance presents a challenge if you have a home in the city. To help you care for your roofs and prolong their effective lifespan, we compiled these simple but effective tips.

  1. Regular Checkup. There is no harm in going up and checking your roof on a regular basis. You can also follow a schedule when to check on your roof. Most people examine their roofs in early spring for ice damming cause by the cold winter season and in late fall or just before the cold season to clear the roof of dirt that could block the passage of water.
  2. Fungus or Algae infestation. They may not substantially weaken the roof structure but the presence of these unwanted guests on the roof makes for an unsightly appearance of your house. Remove them using a combination of water and bleach. To prevent their recurrence, install zinc or copper metal strips on the roof.
  3. Evidence on the Ground. Broken pieces of roof materials, such as shingles, could fall to the floor. Look for these bits and pieces around the house, which indicates that your roof needs maintenance or repairs.
  4. Gutter Cleaning. Leaves and debris accumulate over time on the roof and gutters. They block the smooth flow of water from the roof to the downspout, which could potentially damage the gutters and lead to costly repairs. Check for these objects in late fall when trees shed their leaves.
  5. Trim the Trees. Trim excess tree limbs that touch the roof. Overhanging branches could damage your roof when they are forcefully blown by winds or scrape the protective coating of the roofing material. They also pose a danger to unsuspecting occupants of the house should they fall.
  6. Check the Flashing. Remember to check the condition of flashing around vents, chimneys and exhaust pipes. Punctured or bent flashing is a common cause of leaks, as well as a dried-out sealant. Since flashing covers a hole in your roof, it is important that it is always in tiptop condition.

How to Easily Install a Mobile Home Roofing

mobile home roofing

Installing your own mobile home roofing will save you a lot of money. It does not take highly-specialized skills to accomplish it. You will just have to equip yourself with the right tools and materials to be used in the installation.

The hardest part in the whole process is the removal of the old roofing material, and cleaning the roof of debris and dirt. Getting help from friends and paid labor is advisable to facilitate the removal. After that you can just follow a procedure on the best way to install a new roof on your mobile home.

Here is a simplified procedure in installing your new mobile home roof:

Step 1

Lay out the insulation on the entire length of the cleaned and scraped roof. Use a knife to cut off excess portion of the insulation. Seams can be sealed using a duct tape.

Step 2

Put furring strips (1 by 4 inches) on the length of the roof, about 2 feet apart. Locate the rafters on the roof and mark their location using chalk lines across the roof width. Feel around the surface of the roof to find the exact location of the rafters. Affix the furring strips to the rafters using a drill and 3½ inch-long deck screws.

Step 3

Cut the corrugated metal sheets to the correct size using a circular saw. Add an extra 8 inches for overhang after measuring the width of the roof. Position the metal sheet along the edge of the roof, but make sure there is an overhang of 4 inches on both sides. Use a drill and 3½-inch deck screws to fasten the metal sheet to the furring strips. Remember to place the foam closure strips on both sides of the metal sheets.

Step 4

In placing the metal sheets on the roof, you must overlap them in one direction only to prevent leaks. Each metal sheet has a mark on one edge. Put the edge without the mark on the edge of the next sheet with a mark. Insert the foam closure strips into the ends of each metal sheet. Do this until the whole roof is covered by metal sheets.

Step 5

To facilitate laying out the metal sheets, remove all vents from the roof including furnace vent. Put markers on the metal sheets where the vent holes would be and cut them out. Be sure to replace damaged rubber boots on all the vents to prevent water leaks. A neoprene rubber roof sealant is effective in caulking cracks and holes around the vents.

Step 6

Attach the gable trim on the ends of the roof and secure it using a drill and 3½-inch deck screws. You now have a new roof on top of your mobile home.

Roofing Materials That Could Withstand Arizona Phoenix Weather

roof-for-arizona-phoenix-weather

One of the hottest cities in the US is Phoenix, Arizona. It holds the highest average temperature during summer among major cities with temperatures exceeding 100 degrees.

Because of the hot Arizona Phoenix weather, keeping cool is a primary consideration in house construction and repairs. Most structures use air-conditioning to keep the temperature cool inside. However, this is not the primary factor planners have in mind when constructing houses. Their priority is the roof, particularly using the correct materials and design to combat heat.

Builders choose from a wide selection of roofing materials. There are, however, certain materials that are better suited for places with hot weather like Phoenix, Arizona. Some of these are:

Terra Cotta and Clay

The cooling effects brought by terra cotta roofs are found not only on the materials used but also on the design itself. The curved or “S”-shaped roofing materials are placed in interlocking fashion to form beautiful arches. The spaces between the tiles allow air to freely flow and circulate, thereby rapidly dissipating heat and keeping the structure cool inside.

Rubber Membrane

A product of modern technology, rubber roofing is made from thermoplastic or ethylene propylene diene Monomer (EPDM), a synthetic rubber. The reflective properties of the rubber minimize heat absorption from the sun and keep the structure cool. Roofers get extra benefits from using rubber-membrane roofing – waterproofing the roof because of their seamless nature, which further prolongs the roof lifespan by preventing water from seeping in.

Concrete

An affordable alternative to other roofing materials that many builders in hot countries prefer because it takes a long time to heat up from being exposed to the sun. Concretes are either poured to form slab roofs or installed as tiles. An added advantage from using concrete roofing materials is their fire-proof qualities. Roofers can enhance the cooling capabilities of concrete roofs by using light colors that reflect sunlight.

Slate Tiles

A very common roofing materials that originated during the 17th century. Slates come from natural stones and are available in light and earth-toned colors. The material’s reflective properties reduce heat absorption from the sun and keep the building interior cooler. Its global use can be attributed to its reputation as a cool material for roofing and availability in places where slates are abundant.

Solar Panels

Phoenix, Arizona with its arid weather and long sunny days is perfect for this type of roofing system. Solar panels or photovoltaic roof shingles do not actually reflect sunlight but absorb them and convert the heat into electricity.

Should You Go For Concrete Tiles in Miami Roofing?

concrete roof in miami roofing

Going for concrete tiles in Miami roofing is highly recommended. It presents a lot of advantages for the home owner.

This article will focus on the benefits of getting concrete roof tiles in this tropical city. The downsides of this choice will be discussed here as well. Hopefully, at the end of the article, this will help you decide if you should go for this option in your roofing.

Advantages

Here are the benefits of having concrete tiles in Miami roofing:

1. Very Resilient

The product is very durable. Provided that the tiles were installed properly, they can stand heavy winds, rain and other elements that can easily wear or tear down other roofing options. Concrete tiles are ideal for people living in coastal areas as well because these are resistant to salt and moisture that usually corrode other types of roofing, especially those with metal composition.  Also, these are normally flame-retardant.

2. More Affordable

The clay or slate types will surely give you a bang for your buck. Concrete is a lot cheaper than most roofing tiles. Combine that with their guaranteed longer life than other alternatives plus low maintenance costs and you will have a money well-spent.

3. High Insulation

These offer enhanced convenience within the home because of their capability to maintain temperatures at a cool and comfortable level. An added sarking under the tiles can help maintain their cooling effect better.

4. More Quiet

The density of the tiles buffer sounds from the falling rain or vibrations produced by noisy vehicles like cars, trains, and even the aircraft flying over the home.

5. Safe for the Health

Concrete tiles are typically made from natural ingredients. Thus, people with allergies to certain components of  synthetic stuff need not to worry about these.

Disadvantages

Despite its benefits, this type of tiles has its downsides, these are:

1. Heavy

Concrete tiles are heavy. You must ensure that the structure of your home can support it. On the other hand, there are now lightweight types of these products. Then again, the lighter ones are usually less resilient than their heavier counterparts.

2. Needs Reliable Sealant

Although concrete tiles are resistant to water, the roof still requires a quality sealant that will fill the gaps in the installation of the material. This will prevent water from accumulating at the base of the roof.

3. Color Fades

These are hard, but their colors can fade in the long run after long exposure from the sun, rainwater, and other natural elements.