Most Common Mistakes in Shingles Installation

shingles installation

Some people—particularly the do-it-yourself owners—prefer to do repair works on their roofs themselves instead of hiring licensed roofers. While this may save them money that would otherwise have been spent to pay for professional contractors, there is a risk they might commit mistakes.

Below are some of the most common mistakes in shingles installation that may be committed by inexperienced roofers plus their remedies and prevention based on United Home Experts:

1. No Starter Strip

Employ starter shingles starting at the rake and going into the eaves. The starter shingles are cut by around nine inches for new construction to fit the existing first course. For three-tab repair shingles, the measurement is five inches. The first shingles should be cut by six inches so that the shingles could stagger out of the first course.

2. Misaligned Shingles

This creates an unsightly look on the roof. Make sure the vertical and horizontal alignments are in place. Use a chalk line when installing new shingles. For repairs, simply align the new shingles to the existing shingles. Set horizontal chalk lines every 10 inches starting from the bottom. Vertical chalk lines are made every 36 inches starting from the ridge to the end of the shingles on the first course.

3. Shingles Not Properly Nailed

Always read the product specifications by the manufacturer on the number of shingles to be installed based on local wind zone. Three-tab shingles usually require at least four nails although the number of nails could go up to six in places where strong winds blow.

Aside from the number of nails required to properly fix the shingles to the roof, the location where the nails are driven is just as important. Again, look at the manufacturer’s instructions to know where the nails should be placed on the shingles. Know also the length of nails required for the right shingles. As a rule of thumb, nail penetration should be at least three-quarters of an inch.

4. Using the Wrong Cement

Improper use of incompatible cement and other adhesives could further damage the shingles. Asphalt cement should only be used on the underside of shingles.

5. Shingles Do Not Overhang the Eaves

Just make sure the shingles overhang at the eaves by not less than half an inch. Ensure that there is enough space between the shingles by about one-sixteenth of an inch. Affix three inches of shingles above the eaves, the number of nails depending on local and geographic conditions.
Eleven Most Common Chicago Roofing Problems

seattle roofing

A minor roof issue could become a major problem later if left unattended. The key to prolonging the lifespan of your Chicago roofing is regular maintenance. Catching roof problems early on and repairing them could save you thousands of dollars in roof repair or replacement.

These are the most common roof problems encountered in Chicago:

1. Ice and Snow

Harsh weather exacts a toll on the roof. Water could run under the shingles and flashing and subsequently refreeze, which could damage the shingles and flashings.

2. Flashing

A constant source of water damage, peeled or misaligned flashing allows water to seep into the house itself. Sealants around flashing could dry out with time or exposure to harsh weather, leaving gaps and cracks on the flashing through which rainwater could get in.

3. Gutters

Keeping the gutter clean and dirt-free is one of the required maintenance tasks you have to observe to keep your roof in tiptop shape. A clogged gutter allows water to flow down the eaves causing water damage. Always check for cracked seams and broken brackets to make sure gutters stay in place and do not leak.

4. Water ponding

This is a very common problem with flat roofs. Water ponding could eventually lead to leakage on the roof with the water penetrating and damaging the interior of the house.

5. Attic

Ventilation is important in keeping the roof strong and healthy. Poor ventilation in the attic, which lies just underneath the roof, causes the roof to deteriorate ahead of time.

6. Wind

It does not require a storm to damage your roof. Even strong winds on otherwise normal days can lift the shingles from a roof’s surface or blow them totally off the roof.

7. UV Light

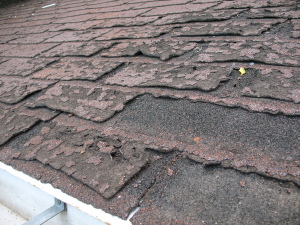
Ultraviolet rays from the sun are one of the causes that roof materials deteriorate. Shingles could crack, dry, come loose or fall from the surface. Once the shingles are out, there is very little protection for the roof, which are now exposed to the elements.

8. Skylights

Leaking may result from snow or ice-covered skylights because of internal condensation when water is unable to evaporate. You may need professional help in working with skylights to avoid damaging them.

9. Trees

Abrasion on the surface of the roof may be caused by overhanging trees. Constant contact between the tree limbs and shingles could wear away the protective layer of the material. Falling branches may also damage the roof. Gutter clogging could occur from falling leaves that accumulated through time.

10. Wildlife

The roof attracts all kinds of critters. Birds peck on the eaves while looking for insects. Raccoons pull up shingles looking for passage to the attic. The holes left by birds and animals expose your roof to moisture and its unwanted consequences.

11. Insects

Termites, ants and other insects are serious problems when left unattended. They gnaw through woods and other soft parts of the roof such as the eaves and fascia boards. Insects also attract animals on the roof looking for them as food.